Overpass Callouts
Overpass (de_overpass) is a bomb defusal map set in Berlin, Germany, featuring elevated highways, water tunnels, and wide open areas around the A and B bombsites. Its vertical design, diverse sightlines, and multiple rotation routes reward map control, coordinated utility usage, and smart team strategies in competitive play.

Overpass Overview
Overpass is a large, layered map focused on map control, vertical positioning, and coordinated utility usage. The map features two bombsites at different elevation levels, making rotations and information gathering especially important. Controlling Connector, Bathrooms, and Short B is critical for both sides to enable successful executes and defenses.
This overview pairs best with learning the main callouts, understanding common CT and T setups, and practicing effective utility usage.
Characteristics
Balance
Generally balanced with strong CT defensive options
Win Conditions
Map control, utility efficiency, and coordinated executes
Map Control
Connector and Short B control are crucial
Rotation Time
Moderate, with fast rotations through Connector
Key Areas
A Site
Elevated bombsite with long sightlines and open space
B Site
Lower bombsite accessed primarily through Short B and Monster
Connector
Central rotation point connecting Mid, A, and B
Bathrooms
Primary route for A Site control and pressure
Short B
Critical choke point leading into B Site
CT Spawn
Main rotation route between bombsites
Overpass Main Callouts
Learn the most important Overpass callouts for A Site, Mid, and B Site to improve communication, rotations, and round execution.
A Site
- TruckCover spot directly inside the A Site plant spot.
- Close LeftCorner near A Site for defensive plays.
- VanCover spot in A Site for peeking.
- TrashStaircase with cover leading into A Site.
B Site
- HeavenHigh-ground position overlooking B Site.
- BoostJump-up position for peeking or aggressive plays.
- BridgePath on the side of the B Site for rotation.
- PitLow cover position near B Site.
- RampSlope providing access into B Site.
- BarrelsCover for peeking or defending near B Site.
- PillarCover point near B Site for tactical plays.
- SandbagsDefensive cover near B Site.
- Sewers / CanalOpen area that is overlooked by B Site.
- MonsterHigh-traffic corner near B Site for cover.
Mid
- MidCentral rotation point connecting A Site and Connector.
- ToiletsHallway connecting Mid to A Short.
- SandwichCover spot near Mid for peeking or defense.
Other
- T SpawnStarting point for Terrorists to rotate or execute strategies.
- Upper TunelsPathway connecting T Spawn to Mid and A Site.
- Lower TunnelsLower corridor giving access to Connector from T side.
- Ladder / DropElevation change for quick Tunnels rotation.
- PlaygroundOpen area near T Spawn for rotations and fights.
- FountainProvides cover for Ts pushing into Mid.
- RockGives cover inside of A Long.
- TreeGives cover inside of A Long.
- LongPathway from T side into A Site area.
- CafeCorner near Mid for cover and peeks.
- BalloonsCover overlooking Mid for defensive plays.
- Long ToiletsConnects Long to Mid.
- ShortPath from Mid to A Site for rotations.
- FlowersCorner providing cover near A Site Short.
- BankHidden room for rotating around near A Site.
- WalkwayEntrance into B Site for CTs.
- ABCCorner used for holding B Site.
- WaterOpen area connecting Short Tunnel to Connector and B Site for rotations.
- DoorInteractive door connecting Connector and Water.
- ConnectorRotates between Mid and B Site.
- Tracks / DirtOpen area connecting T Spawn to both tunnels.
- Short TunnelConnector from Tracks to Water.
- AlleyWalkway for Ts to begin their push into B Site.
- DiscoHidden corner of the map that can be used for saving.
Overpass CT Strategy
Common Counter-Terrorist setups and positioning principles in Overpass to help you hold sites and win rounds.
2 A, 1 Connector, 2 B
Two players defend A Site and Bathrooms, one controls Connector, and two anchor B Site. This setup provides strong map control and flexible rotations.
Pros
- Strong Connector Control – A dedicated Connector player enables fast rotations and information.
- Balanced Defense – Both bombsites are defended with enough players to delay executes.
Cons
- Utility Dependent – Maintaining map control requires consistent grenade usage.
- Connector Pressure – The Connector player can be isolated by coordinated utility.
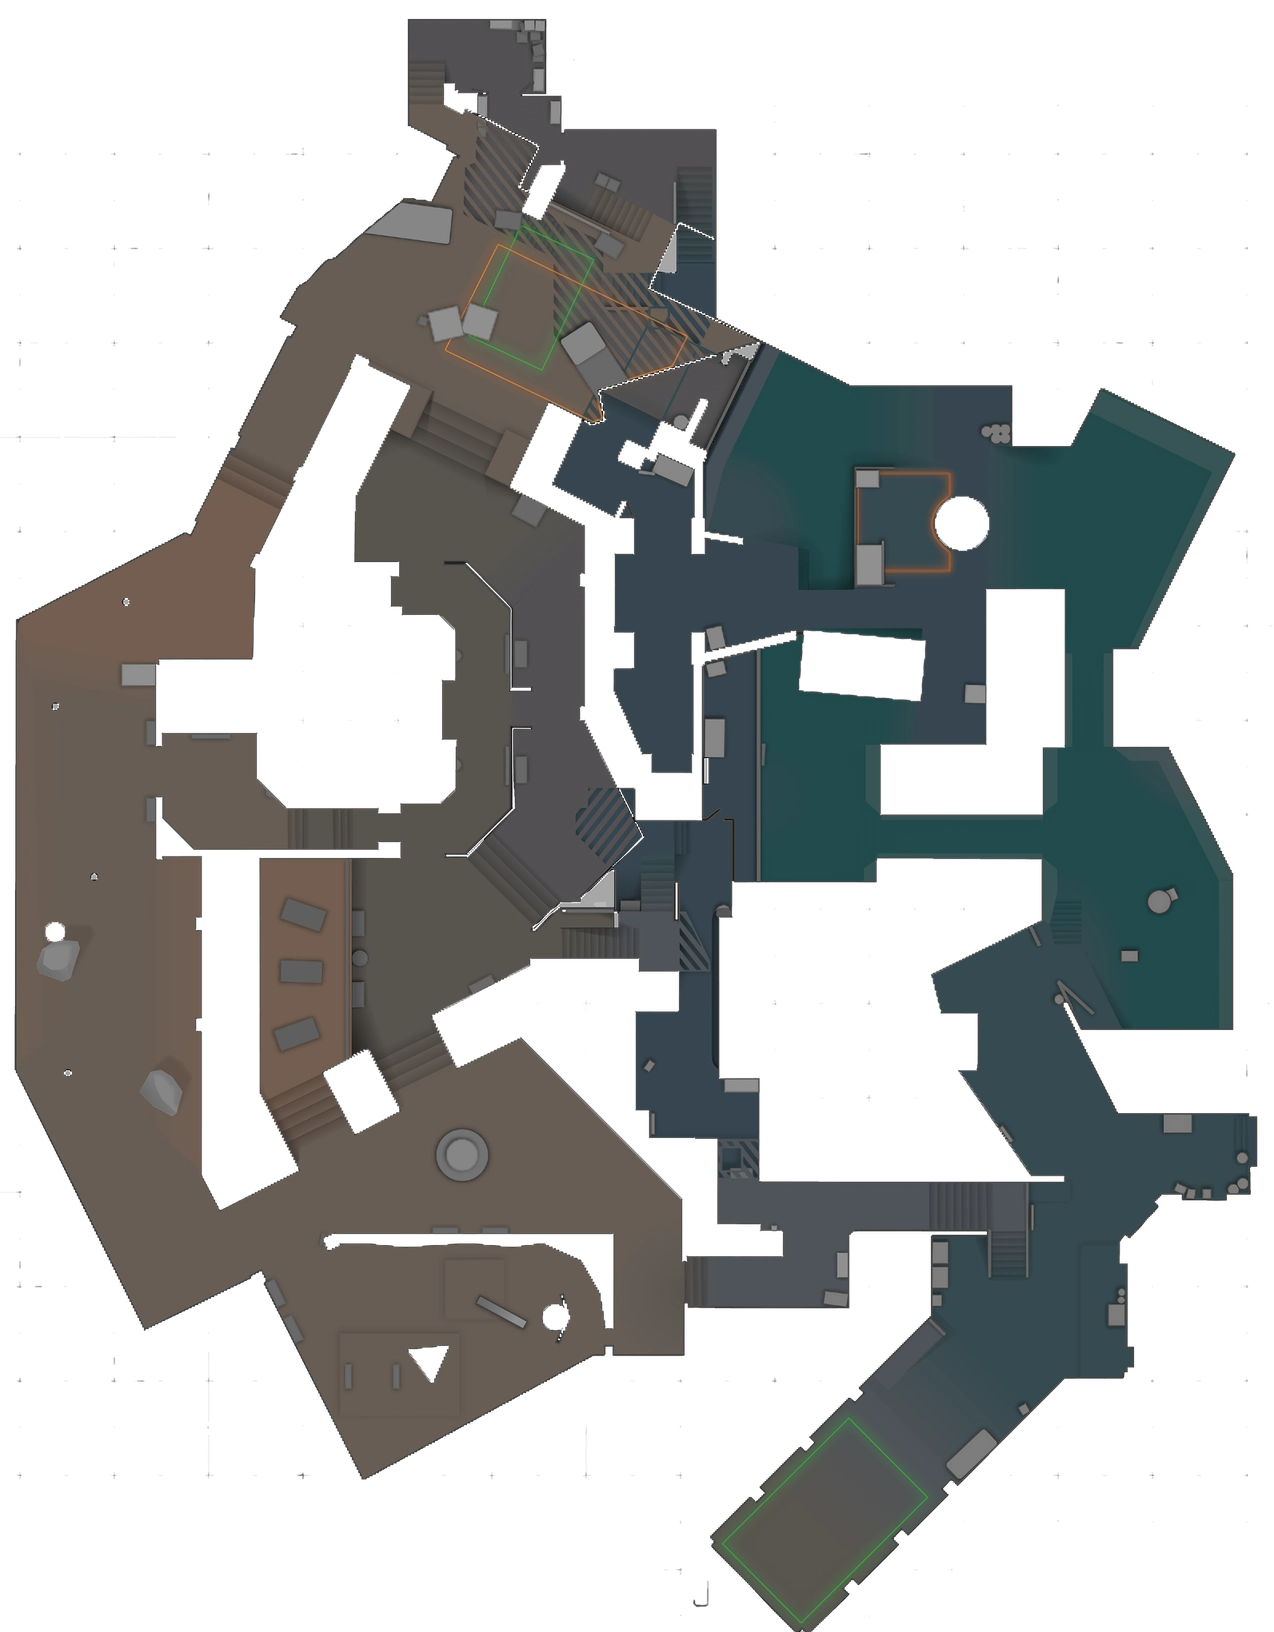
3 A Control, 2 B
Three players focus on controlling A Site and Bathrooms while two defend B. This setup aims to deny A control and force Ts into B-heavy executes.
Pros
- Strong A Denial – Multiple defenders make A Site difficult to take.
- Early Information – Aggressive Bathrooms control reveals T intentions.
Cons
- B Pressure Risk – Two B defenders can struggle against layered executes.
- Rotation Timing – Late rotations can be punished if Connector is blocked.
Aggressive Short B Control
CTs contest Short B early using utility and coordinated aggression to limit T-side B options.
Pros
- B Site Security – Early Short B control makes Monster-only executes predictable.
- Information Advantage – Early contact reveals B-side intentions.
Cons
- High Risk – Early fights can quickly swing momentum.
- Utility Heavy – Requires consistent flash and smoke usage.
Positioning & Rotations
Hold long sightlines and play off Bathrooms control. Utility is key for delaying executes.
Control Short B and Monster with smokes and molotovs to delay pushes.
Central position for rotations and information gathering.
Aggressive control can deny Ts space and gather early information.
Retakes rely on controlling Connector and using utility to isolate angles. B Site retakes are generally more manageable than A.
Overpass T Strategy
Common Terrorist setups strategies for attacking Overpass sites and starting powerful pushes against defending players.
A Site Bathrooms Execute
Ts take Bathrooms control before executing onto A Site using smokes and flashes to isolate defenders.
Pros
- Strong Site Isolation – Utility cuts off common A Site angles.
- Post-Plant Control – Bathrooms provide strong post-plant positions.
Cons
- Utility Dependent – Requires multiple grenades to execute effectively.
- Long Rotations – Late executes can allow CTs time to rotate.
B Site Monster Execute
A direct execute through Monster designed to overwhelm B Site anchors with speed and utility.
Pros
- Fast Timing – Quick hits can catch defenders off guard.
- Clear Entry Path – Simple pathing allows for decisive entries.
Cons
- Choke Point Heavy – Monster can be dangerous against prepared utility.
- Limited Exit Routes – Once committed, retreating is difficult.
Mid Control → B Split
Ts gain Connector control before splitting into B Site through Short and Monster.
Pros
- Forces Rotations – Connector pressure pulls defenders out of position.
- Multiple Entry Points – Splits make it harder for CTs to hold crossfires.
Cons
- Execution Complexity – Requires precise timing between groups.
- Connector Contest – CT utility can slow down Mid control significantly.
Positioning & Rotations
Primary staging area for A Site executes and post-plant control.
Critical route for splits and rotations.
Key access point for B Site pressure.
Overpass Utility Usage
Key smoke and molotov grenade lineup spots on Overpass to control vision, block angles, and support your team.
Bank Smoke
SmokeBlocks elevated defenders on A site, essential for a clean A take.
Heaven Smoke
SmokeObscures Heaven vision on A site, delaying CT rotations.
B Heaven Smoke
SmokeCritical for B site executes, denying defenders vision from above.
Monster Molotov
MolotovClears Monster corner and denies Connector support during B site takes.
Back Site Molotov
MolotovForces defenders off deep positions on B site, easing entry for Ts.